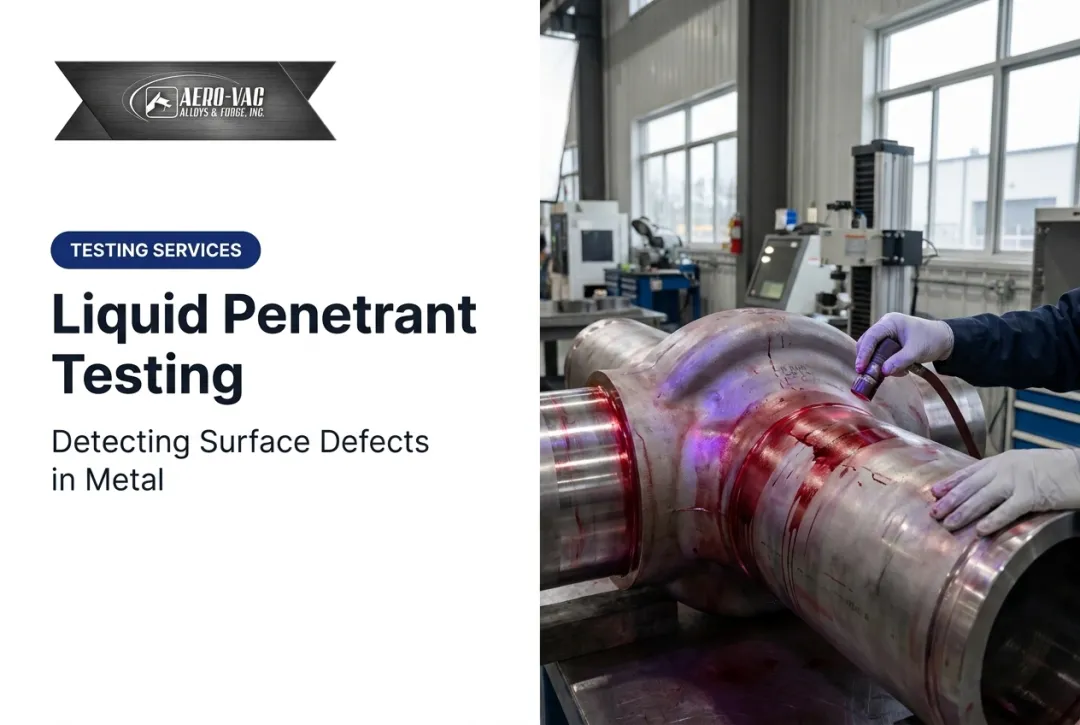

The method itself isn't complicated. You clean, apply dye, wipe, develop, and inspect. But results vary wildly depending on how well each step gets executed. Skip a cleaning pass or rush the dwell time, and you'll either miss a real crack or chase a false one.
This guide walks through the exact steps, when VDPI makes sense, what you need before starting, the variables that make or break your results, and how to troubleshoot when indications don't behave.
TL;DR
- VDPI uses capillary action to pull visible red dye into surface flaws, then white developer draws it out as a clear indication
- Works on nonporous metals such as aluminum, stainless steel, and titanium, per ASNT
- Success hinges on clean surfaces, correct dwell time, and controlled developer coats
- Most failures trace back to bad cleaning or improper excess-penetrant removal
- Requires trained technicians and adherence to specs like ASTM E1417
How to Do Visible Dye Penetrant Testing
Step 1: Pre-Clean and Prepare the Surface
Nothing in this process works if the surface isn't clean. Oil, grease, paint, scale, and dirt all block capillary action before it starts.
- Remove contaminants with a solvent cleaner or degreaser
- Confirm the surface is completely dry (trapped moisture blocks penetrant entry; see Magnaflux's common misunderstandings guide)
- Verify no coatings or platings remain; penetrant can't displace paint or plating
- Tools needed: cleaner/remover, lint-free cloths, wire brush if scale is present
Step 2: Apply the Penetrant
Coat the entire inspection area evenly by spraying, brushing, or dipping.
Watch for beading or pulling back; that's a sign of leftover contamination.
Allow the correct dwell time, typically 10-30 minutes, per the penetrant manufacturer's instructions and the defect type you're targeting. Temperature matters:
- Cold surfaces thicken the penetrant and slow capillary action
- Extreme heat can cause premature evaporation
Step 3: Remove Excess Penetrant
This step trips up more inspectors than any other.
- Wipe with clean cloths dampened with cleaner/remover — never spray solvent directly on the part
- Avoid over-cleaning; it pulls penetrant back out of real defects
- Avoid under-cleaning; leftover haze masks small flaws
- Match your removal method to the penetrant type: water-washable, solvent-removable, or post-emulsifiable
Step 4: Apply Developer and Inspect
- Apply developer thinly and evenly (spray, dust, or dip). Too thick masks indications; too thin under-develops them.
- Allow development time, usually 10-30 minutes, for indications to bleed out fully.
- Inspect under white light of at least 100 foot-candles (Magnaflux guidance), looking for deep red lines (cracks) or dots (porosity).
- Document indication size, shape, and location against your acceptance criteria.
- Post-clean thoroughly to remove all penetrant and developer residue before further processing.

When Should You Use Visible Dye Penetrant Testing?
VDPI isn't a catch-all solution. Use it when:
- Detecting surface cracks, porosity, laps, and cold shuts in castings, forgings, and welds
- On-site or in-shop work where white-light inspection is practical but UV/darkroom fluorescent setup isn't
- Nonporous metals, plastics, and ceramics — ASNT confirms the material scope isn't limited to nonmagnetic alloys
Skip VDPI for:
- Porous materials
- Heavily coated surfaces
- Parts where subsurface flaws matter more than surface defects
VDPI only reveals discontinuities open to the surface, not what's buried underneath.
What You Need Before Doing Visible Dye Penetrant Testing
Prep quality determines whether your indications are accurate or misleading. Skimp here, and everything downstream suffers.
Equipment and Material Requirements
You'll need:
- Cleaner/remover
- Visible dye penetrant
- Compatible developer
- Adequate white light source (100+ foot-candles)
Base material quality matters just as much as your process. Certified, traceable alloys from a distributor like Aero-Vac Alloys & Forge (AS9100 and ISO 9001 certified) reduce the risk of mill-related surface inconsistencies that later read as false indications.

Bad mill finish can mimic a crack indication and send you chasing a defect that isn't there.
Skill and Compliance Readiness
Technicians should hold appropriate NDT certification, such as ASNT Level I or II, and follow the governing specification — commonly ASTM E1417 or a customer-specific procedure.
ASNT's Level II PT program typically requires 2 days of formal training plus 30 days of PT-specific experience before certification.
Key Parameters That Affect Results
Consistent results come down to tightly controlling a handful of variables at every step.
| Parameter | Why It Matters | Impact If Wrong |
|---|---|---|
| Dwell time | Fills shallow or fine defects | Too short misses flaws; too long causes background bleed |
| Surface temperature | Affects penetrant viscosity | Extreme heat or cold reduces sensitivity |
| Excess removal technique | Separates real from false indications | Wrong technique is the top cause of bad reads |
| Developer thickness/time | Controls how clearly flaws bleed out | Uneven coats mask true defect size |

Dwell time is the one inspectors most often rush. If you're on a tight schedule and cut dwell short to save 10 minutes, you risk missing the exact flaw you were looking for.
Manufacturer guides list 10-30 minutes for visible penetrants, but always defer to the specific product datasheet and written procedure.
Common Mistakes When Doing Visible Dye Penetrant Testing
Most failed inspections come down to a handful of repeat offenders:
- Skipping or rushing pre-cleaning: leftover contaminants physically block penetrant entry
- Inconsistent dwell times: applying one dwell to every material and defect type instead of matching it to the job
- Over-wiping during excess removal: erasing real indications along with the background
- Wrong developer thickness: too thick masks fine cracks, too thin fails to develop them at all
Troubleshooting Issues During Visible Dye Penetrant Testing
Even with a solid process, results can miss known defects or pick up noise. Use these fixes when indications don't match what you expect.
No Indications Appear Despite Known Defects
Likely cause: insufficient dwell time, or penetrant removed too aggressively.
Re-check dwell time against the product datasheet. Then remove excess with a cloth and cleaner—not a direct solvent spray.
Excessive Background Haze Obscuring the Surface
Incomplete removal of excess penetrant is the usual culprit. Wipe again with a cloth dampened with cleaner/remover. Skip spraying solvent straight onto the part; that step is often what created the haze.
False Indications in Scratches or Machining Marks
Rough surface finish can trap penetrant in non-defect areas. Compare the indication pattern to the surface finish, then lightly polish and re-test if machining marks are the source.
Alternatives to Visible Dye Penetrant Testing
VDPI isn't always the right tool. Depending on material and sensitivity needs, consider:
- Fluorescent Penetrant Inspection (FPI): Higher sensitivity for very fine cracks under UV light, but needs a darkroom and more equipment
- Magnetic Particle Inspection (MPI): Strong choice for ferromagnetic materials and near-surface flaws; not usable on aluminum or titanium, per ASNT
- Ultrasonic or Radiographic Testing: Best when subsurface or volumetric defects are the concern, at higher cost and with specialized training

Conclusion
Visible dye penetrant testing works best when surface prep, dwell time, and developer application are tightly controlled at every step. Most failed inspections trace back to poor cleaning or the wrong parameter selection, not a flaw in the method itself.
Even a well-run PT process can only report what the material allows. Starting with quality, traceable base stock sets the foundation before you pick up a spray can. Aero-Vac Alloys & Forge supplies AS9100-certified alloy steels and specialty metals with the documentation aerospace and defense buyers need, so inspection day starts on solid ground.
Frequently Asked Questions
What is a dye penetrant test?
A dye penetrant test is a nondestructive method that uses capillary action to draw dye into surface-breaking defects like cracks or porosity. A developer then reveals those flaws under white light (visible dye) or UV light (fluorescent dye).
How is a dye penetrant test performed?
The process follows five steps: clean the surface, apply penetrant and let it dwell, remove excess penetrant, apply developer, then inspect under adequate lighting. Each step needs careful control to avoid missed or false indications.
What types of defects can a dye penetrant test detect?
Dye penetrant testing finds surface-breaking flaws such as cracks, porosity, laps, and cold shuts. It only reveals defects open to the surface—not subsurface or internal flaws.
What materials are not suitable for dye penetrant inspection?
Porous materials, unglazed ceramics, and coated or plated surfaces are not suitable. Penetrant cannot enter pores reliably or displace a coating to reach a real defect underneath.
What is the difference between dye penetrant and fluorescent penetrant?
Visible dye penetrant uses red dye viewed under white light, while fluorescent penetrant uses a dye that glows under UV light in darkened conditions. Fluorescent penetrant generally offers higher sensitivity for very fine cracks.
What is the main difference between FPI and MPI?
FPI works on any nonporous material using dye and UV light, while MPI requires ferromagnetic materials and uses magnetic fields to reveal surface and slightly subsurface flaws. Choose based on whether the part is ferromagnetic and whether you need near-surface detection.