
The goal is simple: make invisible flaws visible. Hairline cracks, porosity, seams, and laps can hide on a part's surface until they cause a failure in service. PT pulls those defects out into the open, literally, using nothing more than a colored liquid and a physical principle called capillary action.
Industries like aerospace and defense rely on PT because material failure isn't an option when you're inspecting a landing gear component or a turbine blade. Below, we'll break down how it works, the six-step process, the different method types, and where PT fits into quality assurance for high-performance alloys.
Key Takeaways
- PT uses capillary action to pull penetrant into surface-breaking flaws, making them visible to inspectors.
- Six stages define the process: pre-clean, apply penetrant, remove excess, develop, inspect, and post-clean.
- Methods split by penetrant type (fluorescent or visible dye) and removal method (water-washable, solvent-removable, or post-emulsifiable).
- Surface flaws show up clearly; subsurface defects and porous materials do not.
- Standards like ASTM E165 and ASME Section V govern procedure, materials, and personnel qualifications.
The Science Behind Liquid Penetrant Testing: How Does It Work?
PT's entire effectiveness comes down to one physical principle: capillary action.
The Principle of Capillary Action
Capillary action is the ability of a liquid to flow into narrow spaces without outside force—even against gravity. Think of a paper towel soaking up a spill upward.
In PT, a low-viscosity penetrant gets "pulled" into microscopic surface-breaking defects like cracks and pores through this same force. No pumps, no pressure equipment, just physics doing the work.
Key Liquid Properties
For capillary action to function, the penetrant needs two specific properties:
- Surface tension: Low surface tension lets the penetrant break its surface and slip into a flaw
- Wetting ability: High wetting ability spreads the penetrant evenly, with a contact angle near zero instead of beading like water on a waxed car hood
Capillary force depends on liquid-gas surface tension, contact angle, and defect opening size. Without both properties working together, the penetrant won't find every defect on the part.

The 6-Step Liquid Penetrant Testing Process
Regardless of penetrant or developer type, liquid penetrant testing follows six stages, as outlined in ASNT's method overview.
Step 1: Pre-Cleaning
This is the most critical step in the entire process. The surface must be completely free of oil, grease, dirt, paint, or any contaminant that could block penetrant from entering a defect.
Common cleaning methods include:
- Solvent removers
- Vapor degreasing
- Ultrasonic cleaning
Remove the cleaning agent completely as well. Leftover residue can mask a flaw just as easily as the original contaminant.
Step 2: Penetrant Application & Dwell Time
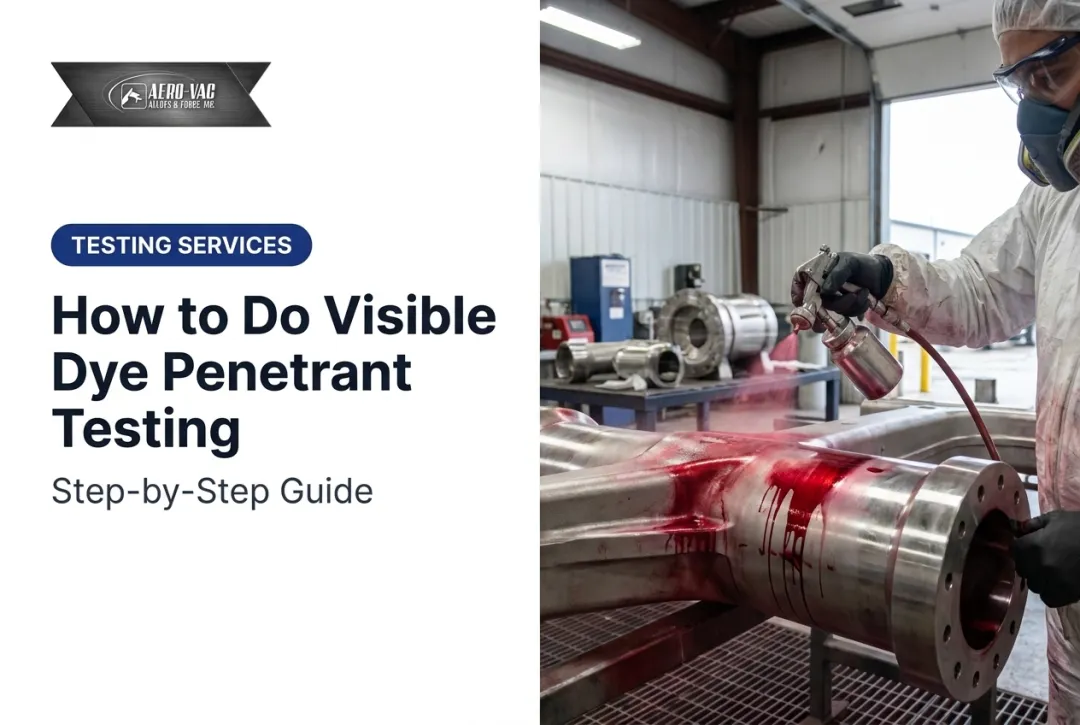
Apply the penetrant—visible red dye or fluorescent—by spraying, brushing, or dipping the part.
Dwell time is how long the penetrant sits on the surface to seep into cracks. Per ASNT's PT training reference, ASTM E1417 specifies a minimum dwell of 10 minutes at 50 to 125°F. Actual dwell time depends on material, temperature, and target defect size—always follow the governing procedure.
Step 3: Excess Penetrant Removal
The goal here is removing all penetrant from the surface without pulling it back out of the defects themselves. That's a delicate balance.
The removal method depends on penetrant type:
- Solvent-removable: wipe with a clean, lint-free cloth
- Water-washable: gentle water wash
- Post-emulsifiable: apply emulsifier, then water rinse
Step 4: Developer Application
Apply a thin, even layer of developer—often a white, chalk-like substance—to the surface.
The developer acts like a blotter. It uses capillary action to draw the trapped penetrant back out of the flaws and spread it across the surface, creating a visible indication.
Step 5: Inspection and Evaluation
Lighting conditions matter here:
- Visible dye penetrants require adequate white light
- Fluorescent penetrants require a darkened area with UV-A (black) light
The inspector looks for indications—the visible bleed-out of penetrant from a flaw. Size, shape, and pattern help identify the defect type beneath the surface.
Step 6: Post-Cleaning
The final step removes remaining developer and penetrant so the part is ready for service or further processing such as welding or painting. Skipping it can leave residues that interfere with later work—or, in some alloys, contribute to hydrogen embrittlement.

Types of Liquid Penetrant Testing Methods
PT methods are classified two ways: by penetrant type and by removal method.
Classification by Penetrant Type
- Type 1 (Fluorescent): Glows bright greenish-yellow under UV-A light. More sensitive; preferred for critical applications.
- Type 2 (Visible): Bright red dye that contrasts sharply against a white developer under normal white light. Common for field inspections and less critical parts.
Classification by Removal Method
| Method | Description |
|---|---|
| Method A (Water-Washable) | Built-in emulsifier; rinses off directly with water |
| Methods B & D (Post-Emulsifiable) | Separate emulsifier step makes oil-based penetrant water-washable after dwell; more control and higher sensitivity |
| Method C (Solvent-Removable) | Wiped with a solvent-dampened cloth; often in aerosol cans for portability |

Method selection depends on service requirements, part volume, and whether the inspection is localized or part of a critical-service evaluation.
Advantages and Limitations of Liquid Penetrant Testing
Liquid penetrant testing is strong on fine surface flaws and flexible materials, but those strengths stop at clear technical boundaries. Weigh both sides before you choose PT over another NDT method.
Advantages
- Detects extremely small surface-breaking cracks and flaws often invisible to the naked eye
- Works on ferrous and non-ferrous metals, ceramics, and some plastics
- Needs minimal equipment and adapts easily for on-site inspections
Limitations
- Finds surface-breaking defects only; subsurface flaws need ultrasonic or radiographic testing
- Fails on porous materials such as concrete or wood, which absorb penetrant and mask real defects
- Depends on surface condition—rough or poorly cleaned parts produce false or inaccurate results (garbage in, garbage out)
ASTM E165 doesn't establish acceptance criteria on its own. A separate governing code or customer agreement must define which indication sizes and types are acceptable versus rejectable.
The Role of PT in High-Performance Alloy Quality Assurance
For aerospace, defense, and motorsports applications, a surface crack that slips through inspection can become a failure point under flight loads or extreme thermal cycling. That's why PT remains a fundamental quality assurance step for high-performance alloys. Certifications like AS9100 exist to make sure suppliers maintain the kind of stringent quality control processes that catch these flaws before a part ever reaches an assembly line. NDT methods like liquid penetrant testing are part of that compliance backbone. At Aero-Vac Alloys & Forge, we operate inside that same AS9100 framework as a certified manufacturing distributor. We supply bars, plates, forgings, and other raw stock to aerospace, defense, and commercial manufacturers who cannot risk surface defects under extreme stress or temperature. Value-added services support that quality path:

- Forging and heat treatment
- Material testing (in-house or via NADCAP-certified partners)
- Saw cutting, machining, and specification-matched procurement Customers sourcing critical alloys get a supplier who treats inspection requirements as part of performance—not paperwork.
Frequently Asked Questions About Liquid Penetrant Testing
What is liquid penetrant testing and how does it work?
PT is an NDT method that uses capillary action to draw a colored or fluorescent liquid into surface-breaking flaws. A developer then pulls that liquid back out, creating a visible indication that an inspector can evaluate.
What types of defects can be detected by liquid penetrant testing?
PT detects cracks, porosity, seams, laps, cold shuts, and shrinkage, as long as they're open to the surface. Anything fully enclosed below the surface won't show up.
What is liquid penetrant testing used for?
It's used for quality control during manufacturing and for in-service inspections of critical components in aerospace, automotive, and power generation. It is applied wherever surface integrity is critical to part performance.
What are the standard requirements for liquid penetrant inspection?
Requirements come from standards like ASTM E165 and ASME Section V, which spell out procedures, materials, and personnel qualifications. Specific industries may layer on additional specs like Boeing BSS 7039 or MIL-STD-6866.
What are the two types of penetrants used in liquid penetrant testing?
Type 1 (fluorescent) glows under UV light and offers higher sensitivity. Type 2 (visible) uses a red dye viewed under normal white light, common for field work.
What does PT stand for in NDT testing?
PT stands for Penetrant Testing, a specific method within the broader field of Non-Destructive Testing (NDT).